USING OUR INSTALLATION SERVICE
Where We Place the House Number and Logo
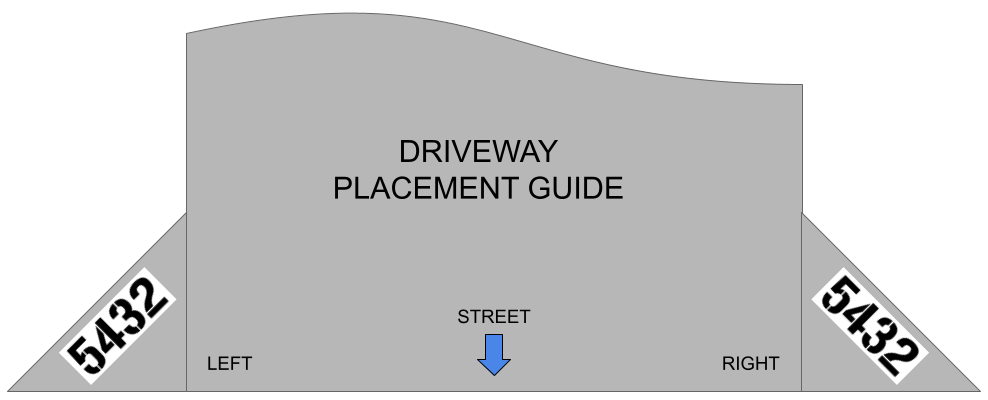
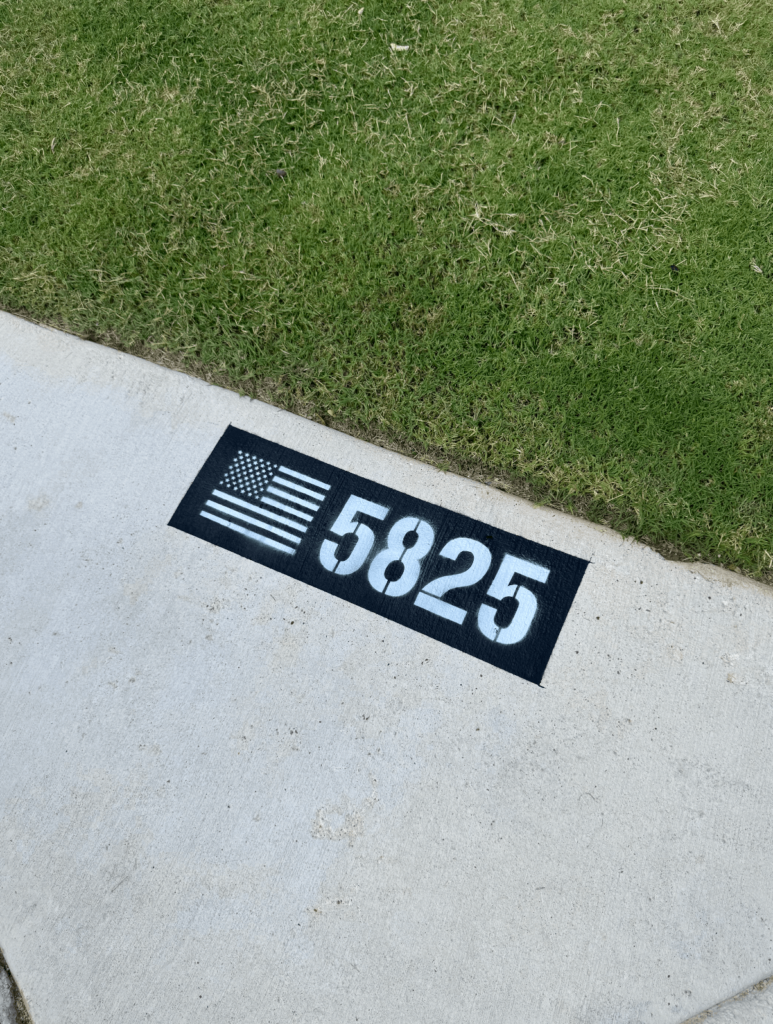
- Standard Placement:
- In neighborhoods where homes have driveways located in the front, we will typically paint your house number and logo on the front edges of the driveway.
- These areas usually include triangular spaces on the left and right sides of the driveway. This placement provides high visibility and low exposure to traffic for a long-lasting finish.
- Alternative Placement:
- If a driveway is not present, or if there are obstacles like cracks or damage that make the driveway placement unfeasible, we will apply the paint to the curb in front of the home.
- If neither the driveway nor the curb offers a suitable surface due to damage or other issues, we will work with you to find an alternative location.
- Consultation for Special Cases:
- In cases where placement is challenging due to surface damage or obstacles, we will consult with you to determine the best solution for visibility and durability.
At Three Creeks Curbs, we’re committed to making sure your house number and logo are perfectly positioned. If you have any special requests or questions, please don’t hesitate to reach out to us before or during installation.
DIY Installation
Supplies Needed:
- Number + Logo Stencil
- Wire brush
- Blower or broom
- Tape measure
- Sharpie marker
- Painter’s tape
- White enamel spray paint (or striping paint if white is the base color)
- Black enamel spray paint (or striping paint if black is the base color)
- (Optional) Overspray enclosure: a box with a 6″ x 19″ rectangular opening cut in the bottom
Step-by-Step Instructions:
- Prepare the Surface
- Select a flat, smooth area free of major imperfections.
- Use a wire brush to scuff the surface and remove any dirt, old paint, or loose material.
- Clear away debris using a leaf blower or broom to ensure a clean application area.
2. Measure and Mark
- Use a tape measure to outline the stencil placement.
- For a design including a logo and house numbers, mark a rectangle approximately 6″ x 19″.
- For house numbers only, mark a rectangle approximately 6″ x 13-15″.
- Use a Sharpie to lightly mark the four corners of the rectangle for guidance.
3. Tape the Area
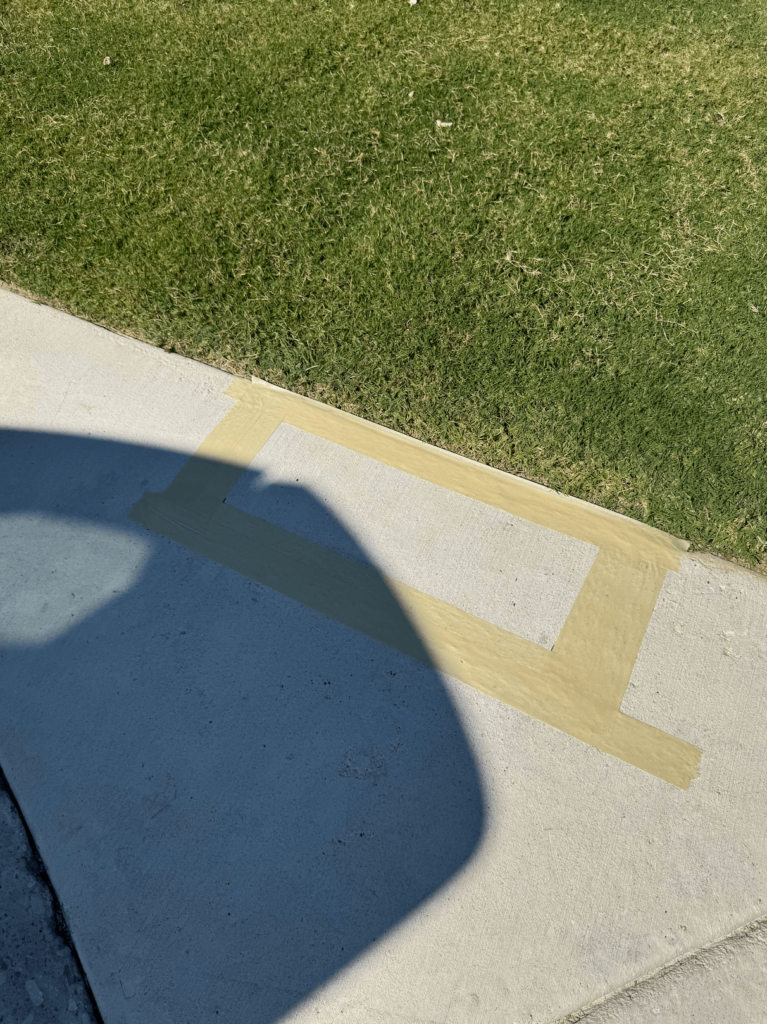
- Using painter’s tape, mask off the rectangular area you marked.
- Allow for about 4 inches of tape width around the rectangle to prevent overspray.
4. Set Up Overspray Shield (Optional)
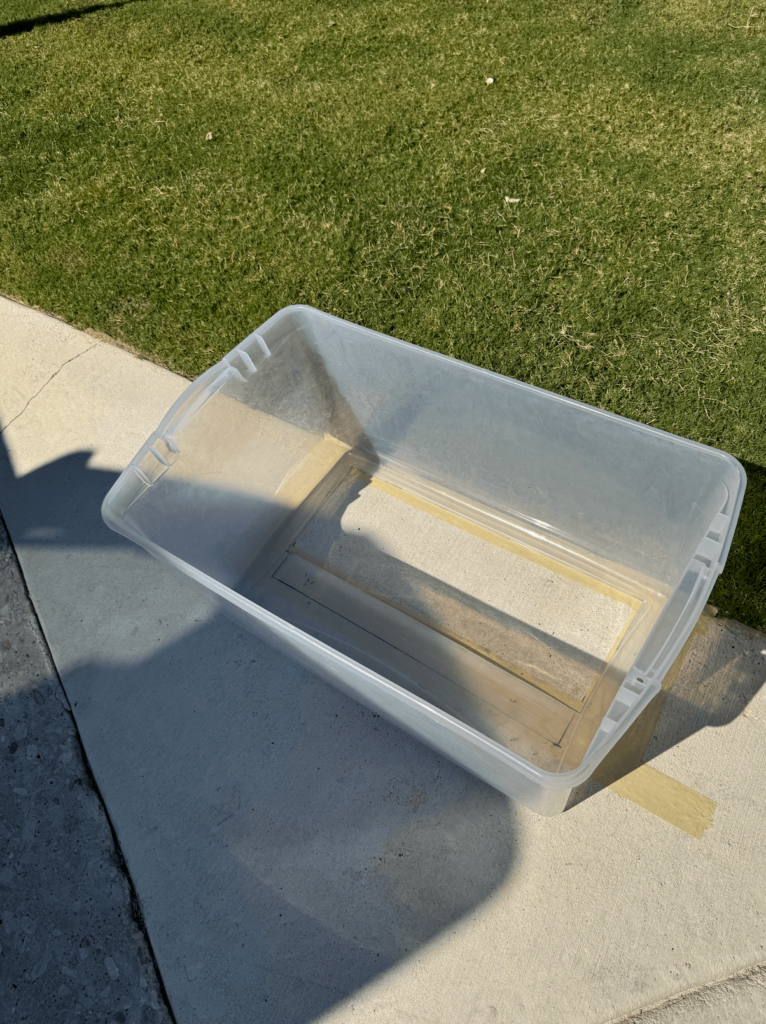
- Use a box or similar shield to prevent overspray and minimize wind interference. Position the box so the opening frames your taped-off rectangle.
5. Apply the Base Coat
- Spray the base color evenly across the entire rectangle.
- Use white enamel spray paint for a traditional black-on-white design.
- You can reverse the colors or customize as desired.
6. Dry the Base Coat
- Allow the base coat to dry for 15 minutes, longer if weather conditions are cool or cloudy.
7. Position the Stencil
- Center the stencil over the painted rectangle.
- Secure it with painter’s tape, ensuring there are no gaps between the stencil and the surface.
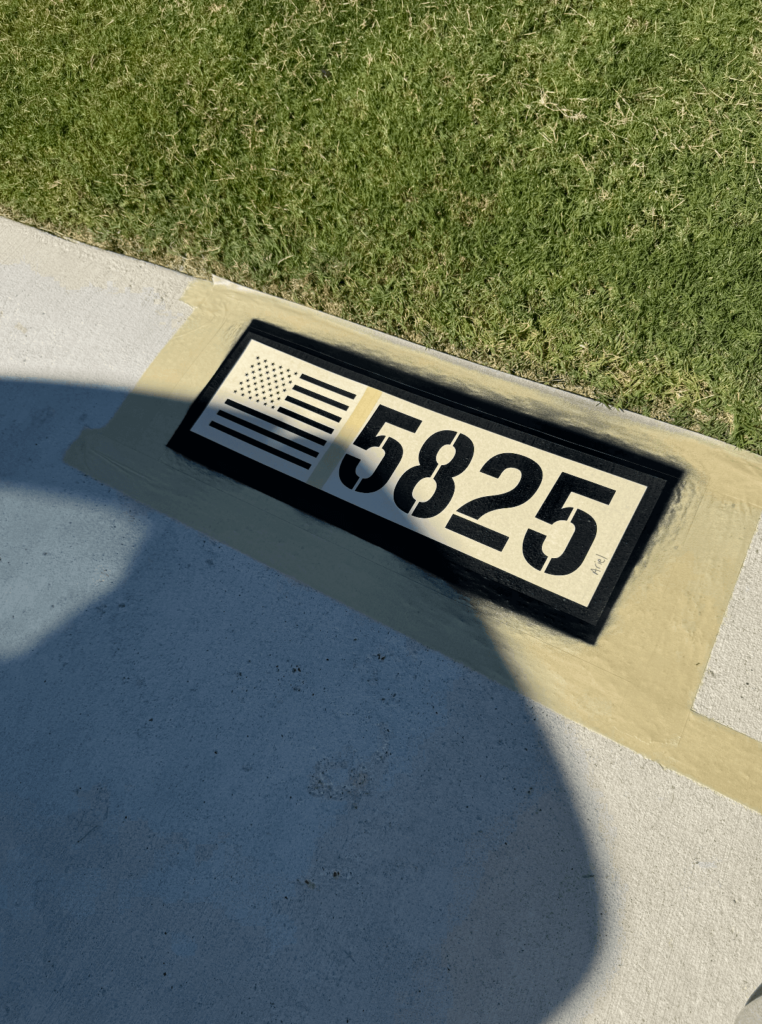
8. Spray the Design
- If using an overspray shield, place it over the stencil.
- Apply the topcoat colors (e.g., black for numbers and logos) using smooth, even strokes.
9. Wait for Paint to Set
- Allow the paint to tack up for about 5 minutes before removing the stencil.
10. Remove Tape and Stencil
- Carefully peel off all tape and lift the stencil.
- The design should be dry to the touch within 15-20 minutes.